CHRISTOPHER
CAPORLINGUA
DMS 420: SOCIABLE WEB MEDIA / TREBOR SCHOLZ
UNIVERSITY AT BUFFALO DEPARTMENT OF MEDIA STUDY
SPRING 2007 PRODUCTION FINAL
a social network visualized
In
this class we have discussed at length the mechanisms and impact of social networking
web sites such as MySpace and Facebook
I was looking to see what the sum of a personal social network might look like.
There already exist today a number of ways to look at such a thing, but these
methods are two dimensional and displayed on screen. Such methods include 'The
Interactive Friend Thing,' an API for Facebook developed by Gordy French
and "Friend Explorer"
by Christopher A. Gorski. These are both very interesting, and I wanted to build
on this idea of mapping out a network as a whole. The problem with creating
another two dimensional method would be that going beyond a limited number of
people causes the visualization to lose shape, becoming more nebulous as links
pile up on each other. An extreme example of this is Jeffery Heer's Large
Scale Online Social Network Visualization project. For my project I wanted
to create a model which took on a greater shape when it was further constructed.
Rather than just truncating the information, actual density and mass builds
up. Through this, I hoped to create an 'artifact' — as
Prof. Scholz put it
— of this conceptual system. In many ways these models show connections
between people in the same way a locket does, just in a more impersonal, complex,
comprehensive and much harder to wear around the neck kind of way.
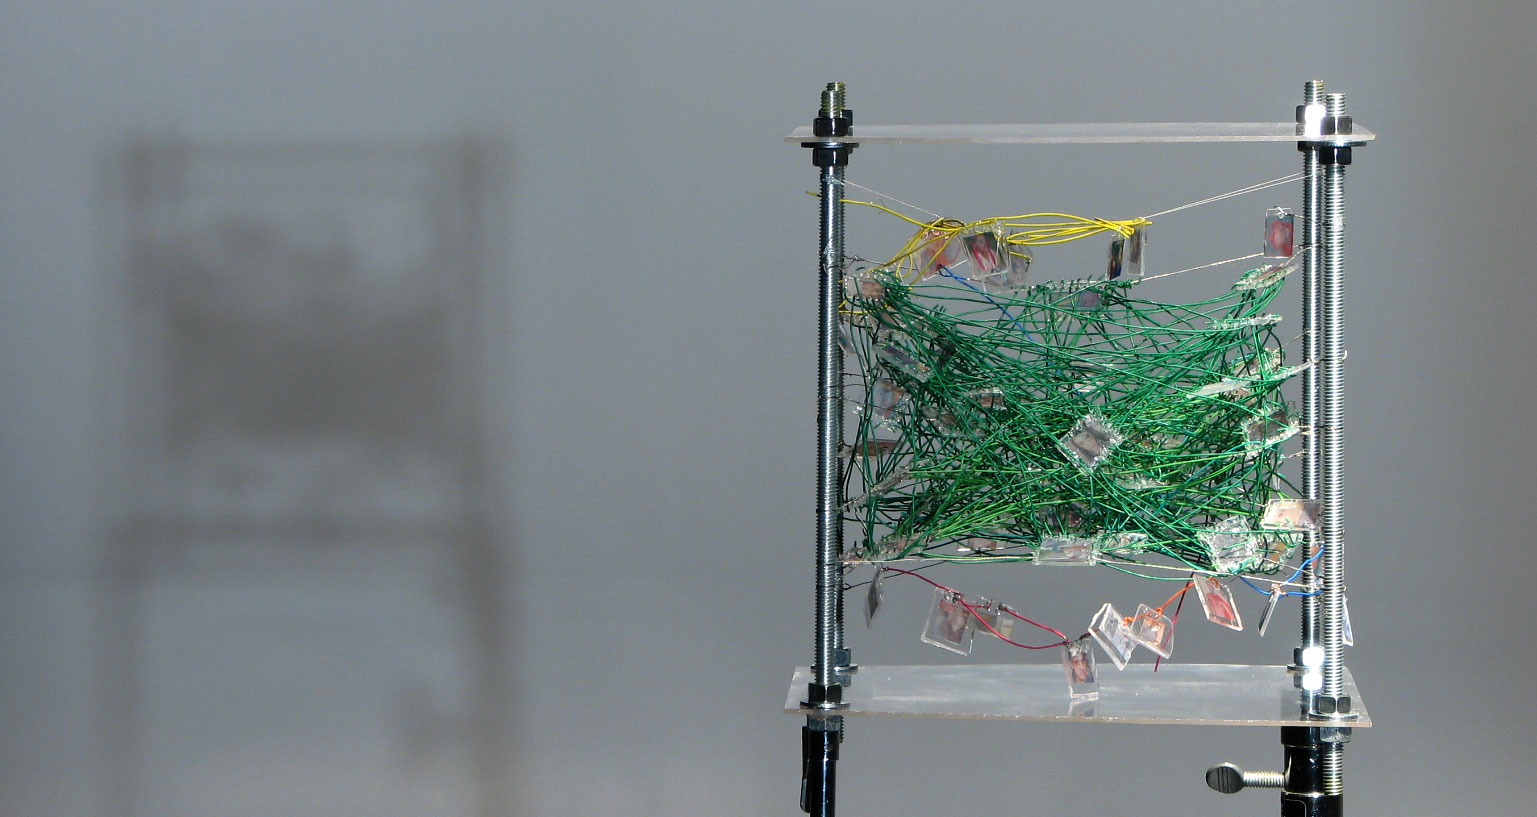
model
one
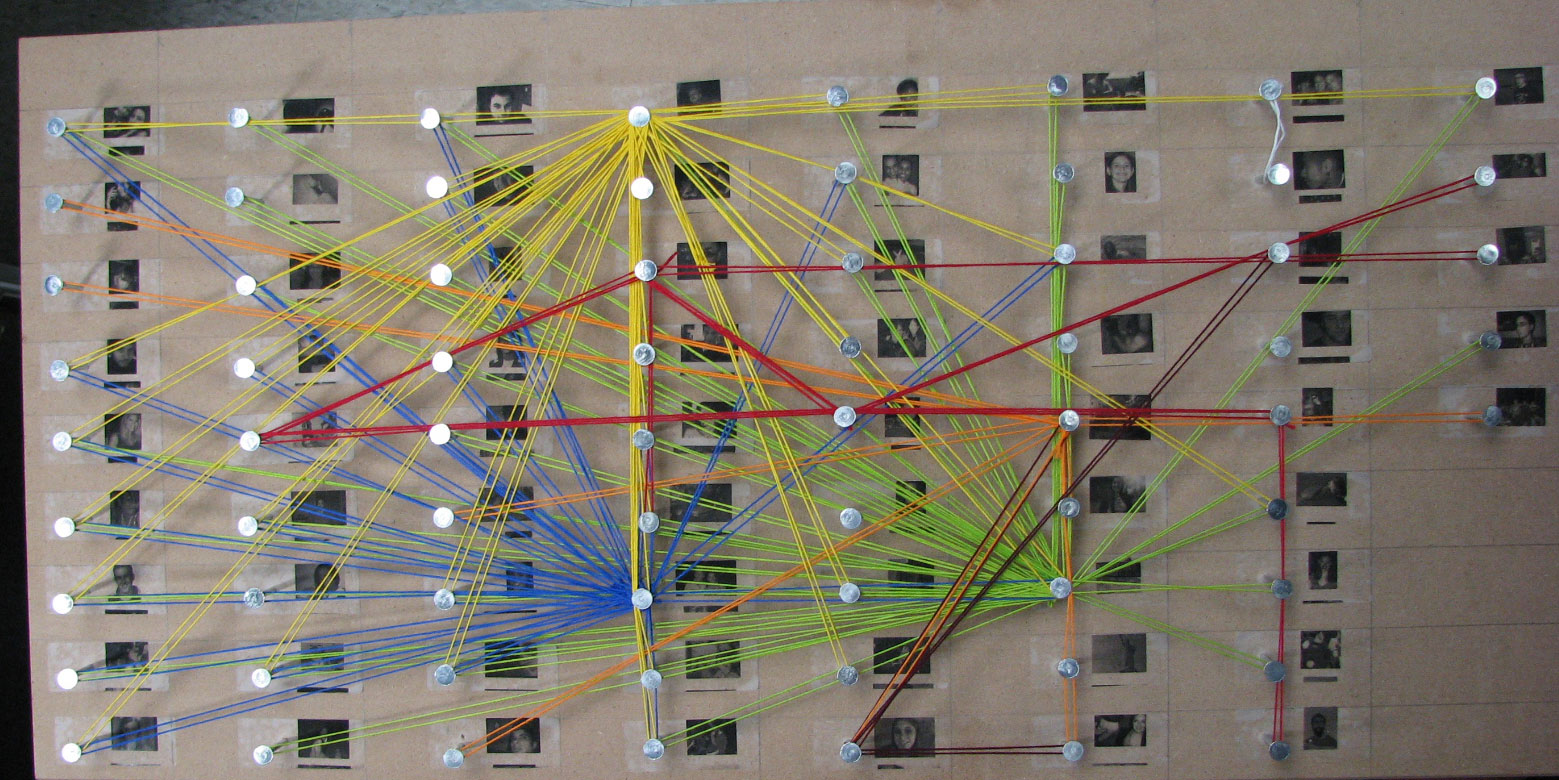
The first model was done to show the aggregate of a social networks and all of the links contained in it. For this project I used a three dimensional space made up of transparent tiles interconnected by wire. Each wire represents a 'friendship' in that they are friends on this network. A person with 10 friends has 10 wires going out to those friends, who also have links to going other people. Some people are not 'friends' with anyone in the model, only with the person whose network the model represents (in this example model, me) so they have no wires connecting them to anything, save for the frame.
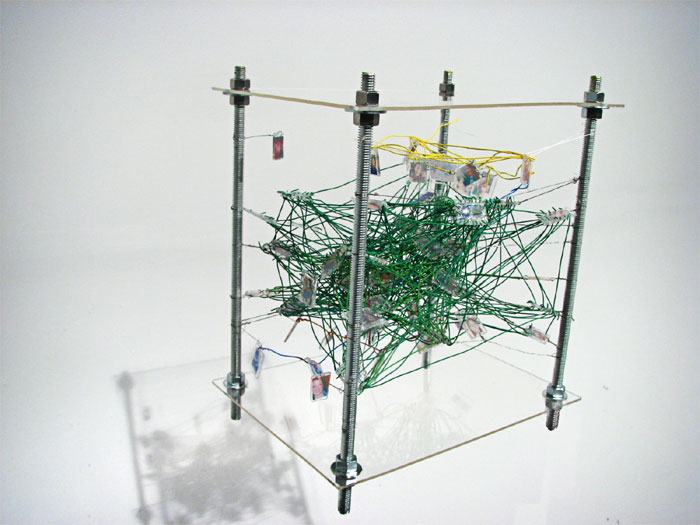
In
this model there is a color separation. The green mass is the largest group
of interconnected friends. There are only two links going out from it. One to
the smaller orange group and one to the red. In all there are four social groupings,
the red, orange, blue, green and yellow networks. This correlated with the social
groupings of classmates /
floor mates /
friends from school /
friends from work and school / friends from home,
in addition to the few loners who are not mutual friends with anyone. I was
very happy to see how this experiment turned out. Certain flat planes were created
as cliques within groupings within a network were made clear through shared
mutual friends. Additionally some especially popular people have around themselves
a star burst of wires going every which way. In the actual model you can see
more clearly one person is related to the rest of the network by pushing on
their tile and seeing the rest of the network move.
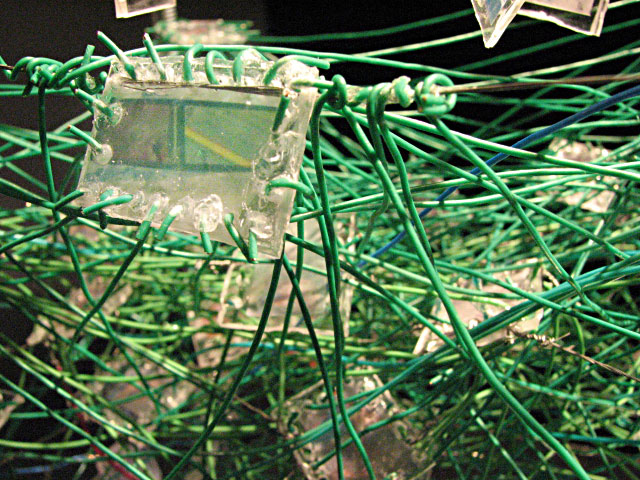
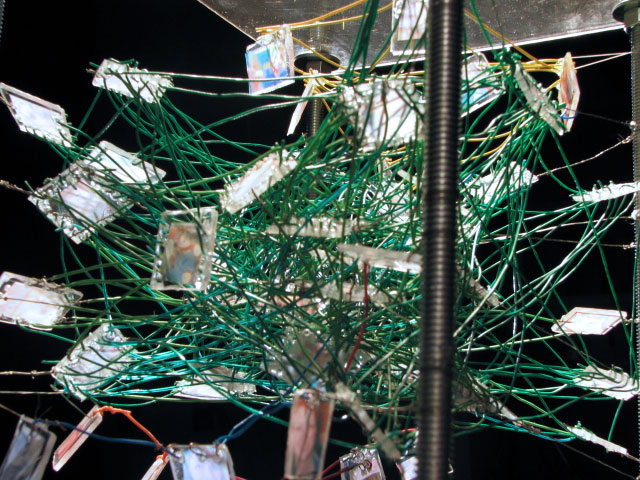
More Pictures:


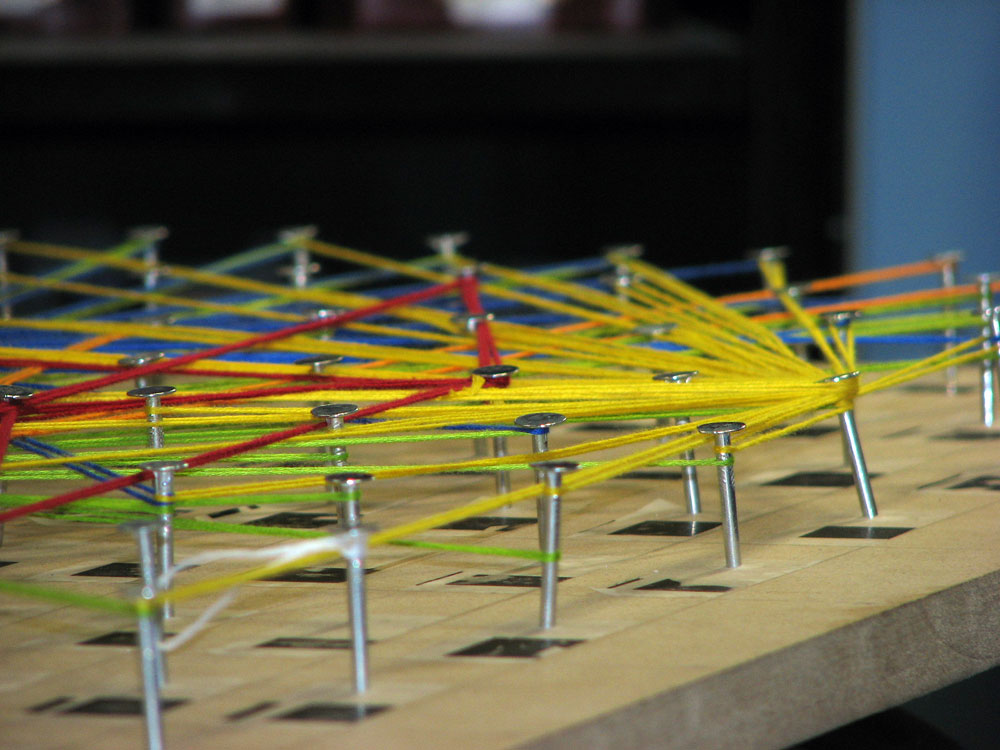
In this model I tried to show not the aggregate of the network, but the quickest way to the sum of the network. In this model I tried to reach the entirety of the network through the smallest number of people. The first person mapped out (green string) covered nearly half the people on the board. The next person covered much of the remainder plus a good amount of overlap (blue string). This went on until only two people were left, who, in a bit of good luck happened to know each other (white string.) This part of the project draws heavily on the observation mentioned in model one about the star bursts.
More Pictures:


how to
On
the off chance that you or someone you know wants to make one of these for yourselves,
here is a brief overview of what to do:
To make the first model I used the following:
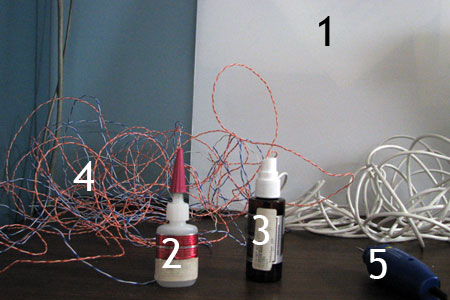
That
is:
1: Plexiglass,
2: Extra thick 15 second CA glue (available at your local hobby store)
3: Insta-set accelerant for CA glue (again, hobby store)
4: Whole lot of wire (the model I made took 300 ft)
5: Imitation dremel tool (this one cost $15, I regret the savings, do not repeat
my mistake)
Not pictured, but also needed are:
- Scissors
- Clear mailing labels (I used Avery 8660 for inkjet)
- Whatever you want to make your frame out of, I used two pieces of lexan and
some carriage bolts.
- X-acto knife
First format all of your friends' profile images onto the template for the labels,
you should be able to fit two per label. Next, cut the plexiglass -- in whatever
way you can -- into as many squares as you have friends. Now place a label on
a square and trim off the border around the edges, this will make it easier
to drill. Now, using your rotary tool, drill as many holes as you have mutual
friends with that person into the square. Now you can mount that first square
on your frame, if you have one (if not, make one). Since it can't connect to
any other people yet, just attach it to the frame. For my model I used strands
from stripped wire. As you start to add more people, make sure to connect the
squares to the other people as well as the frame. Eventually you won't even
need the frame, and you can just connect people to each other. To connect with
the wire, I stripped some wire and tied a simple knot through the hole when
I could. When that wasn't possible, it was easy enough to cut the wire a bit
over length and thread it through the two squares, gluing a stopper on the outside
of the first square, pulling the wire tight, gluing a second stopper and then
trimming off the excess. Using the accelerant with the glue should keep the
mess to a minimum. Repeat this until you are done with everyone. For reference,
this is a time lapse of the ~25 hours that this took me:
To recreate model two, you need:

That is:
1: Hammer
2: Nails (siding)
3: String (embroidery floss)
4: Same labels as before
Not pictured, but also needed is:
- Big plank of wood
This is pretty self explanatory, draw out a grid and put on the labels, this time you don't need to cut the labels and there can be one picture on each.
Now put nails into the board for posts. Then simply see how quick you can have every person accounted for by wrapping a string to and from one person and each of their friends.
Good luck, enjoy.
Other
Projects | Home
Questions? Comments? email.